alchemy-sdk
The Alchemy SDK is two code surfaces:
-
A minimal hardware BSP (board support package) for every Hermetic Modular hardware release. Pin definitions, LED chain layout, and low-level drivers, conforming to the standards set out by the Electrosmith Daisy ecosystem. Build from primitives and have full access to the interface board and Daisy DSP board at the core.
-
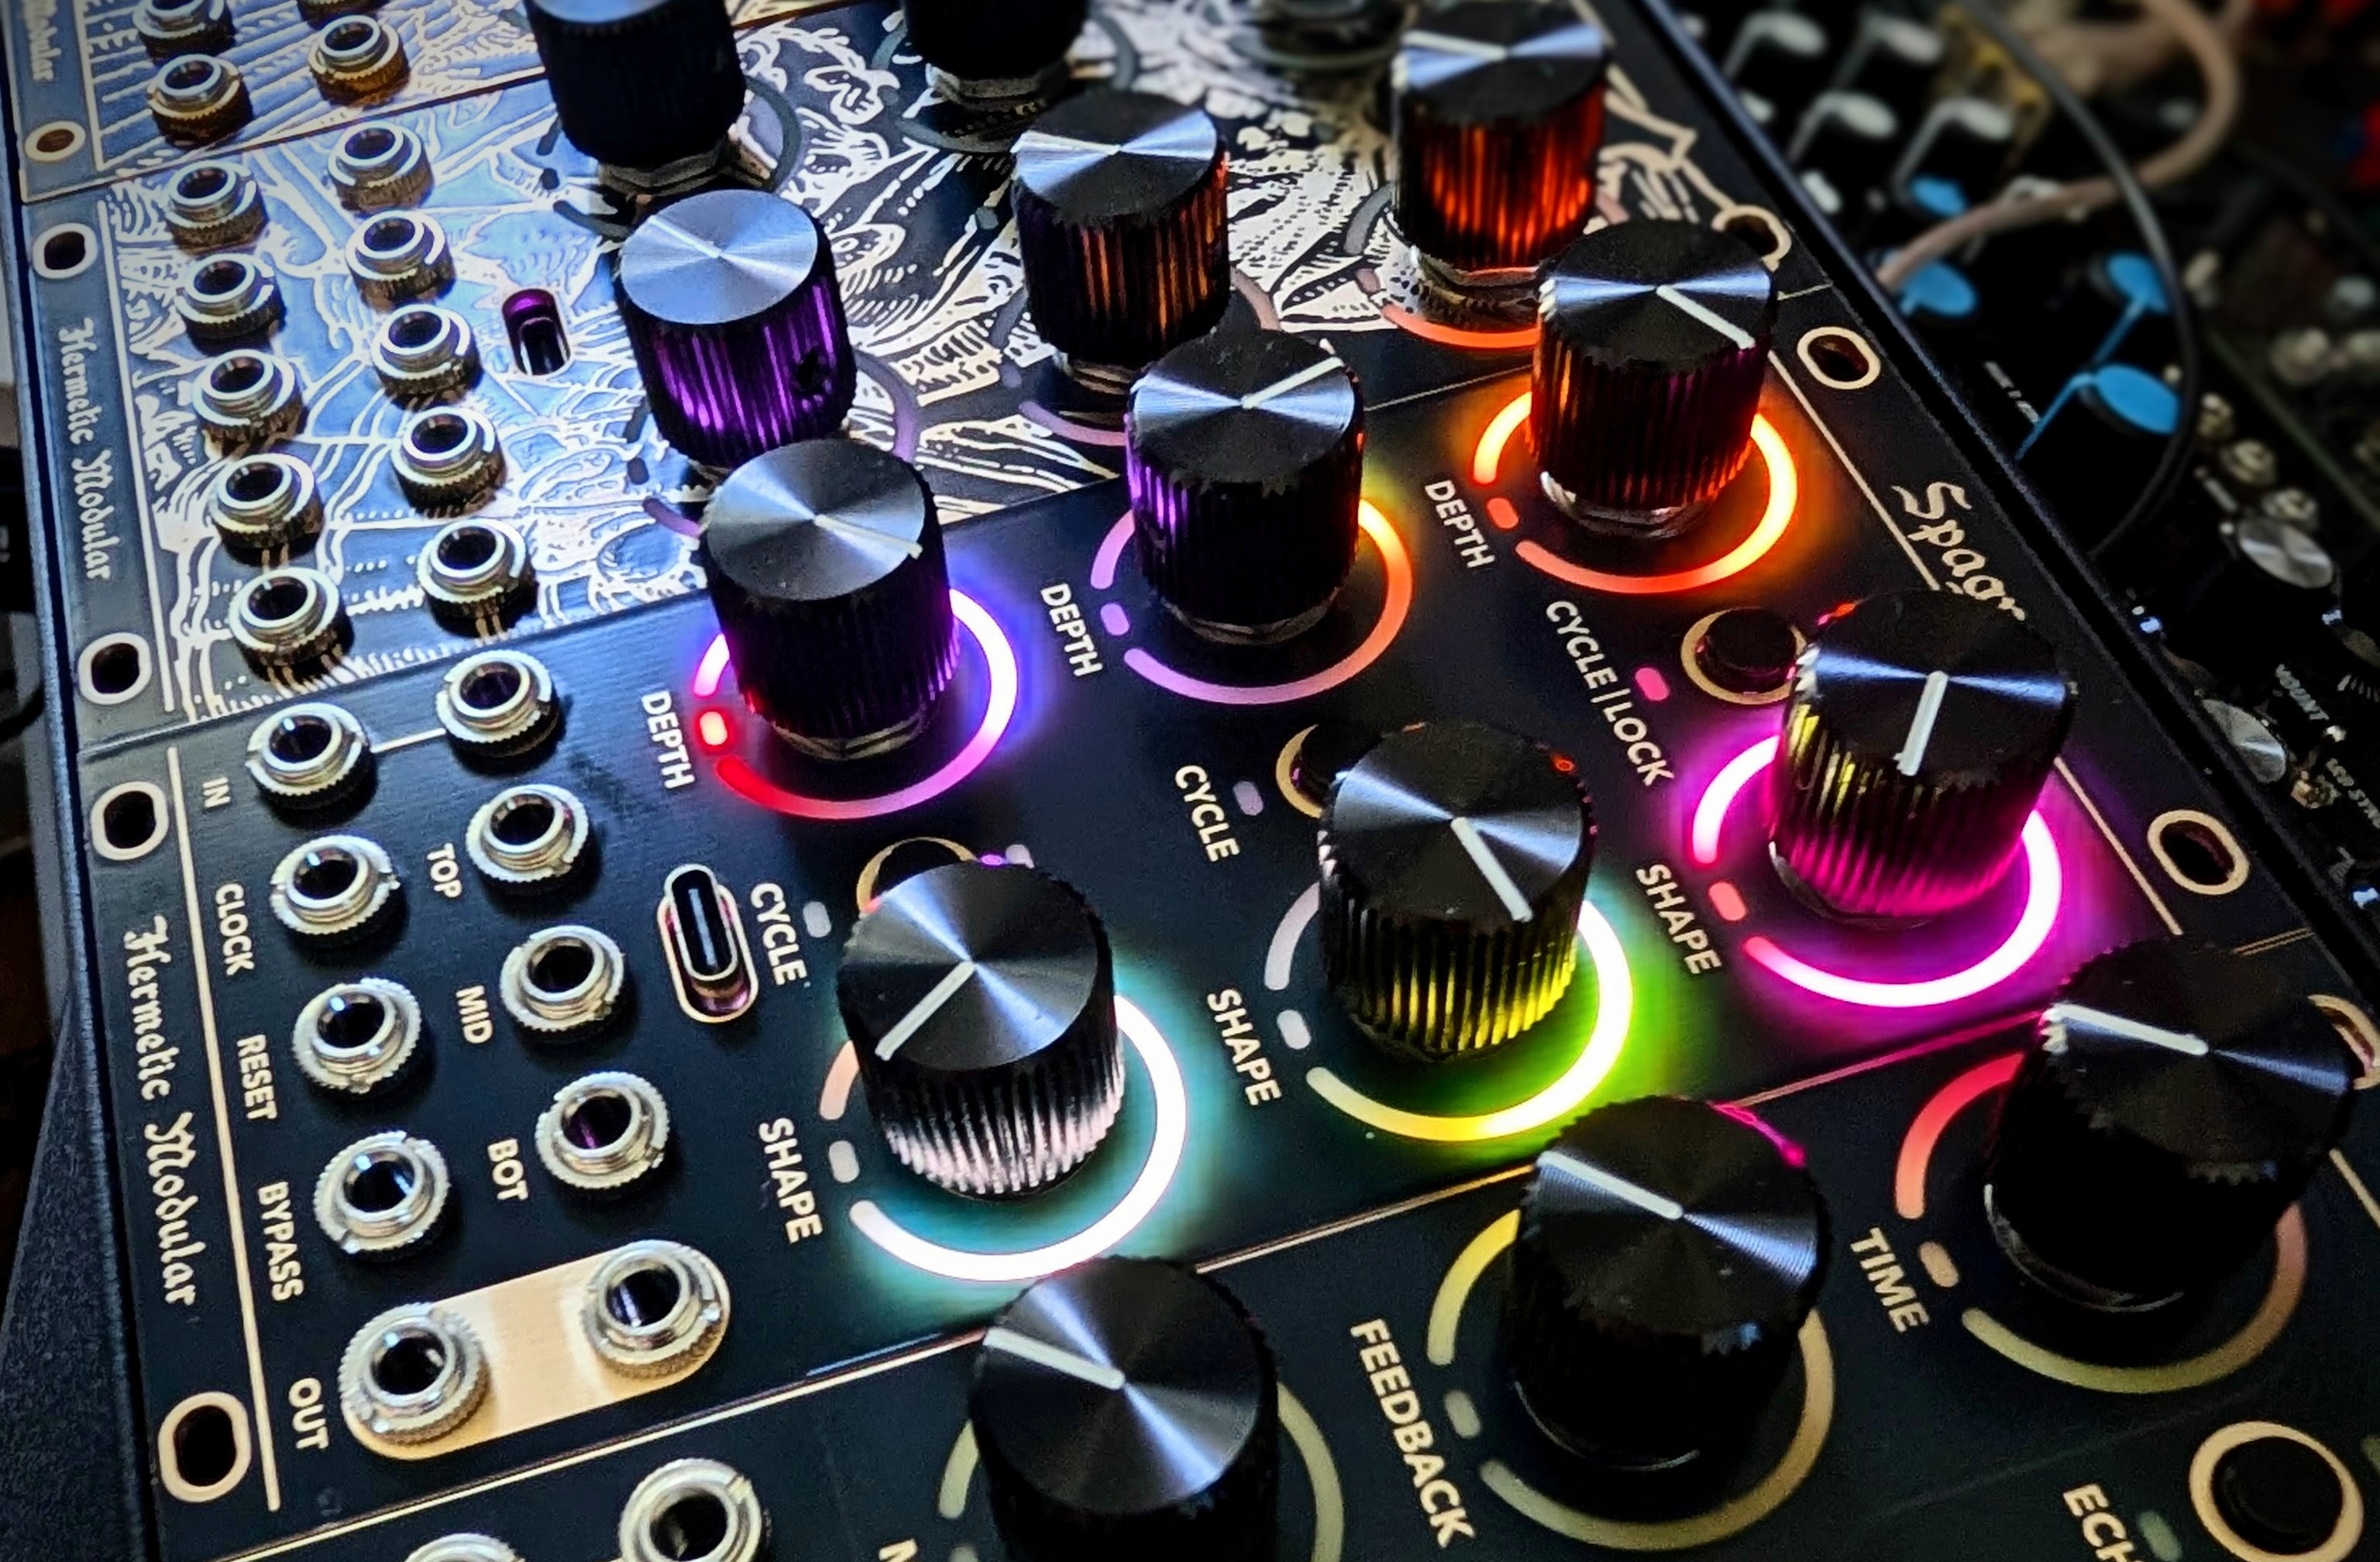
A set of utilities under Framework that unlock advanced features on Hermetic Modular hardware. Declaratively leverage LED animations, field-programmable jacks, and conventions like Pot Catch, Parameter Lock, and settings pages — the same UX you would find on Hermetic Modular's formal hardware releases like Echoa and Spagyros.
Either build from scratch with the hardware BSP, or bring your own DSP and get powerful out-of-the-box features with the Alchemy Framework, or mix and match as you desire.
Supported boards:
- Hermetic Modular Alchemy Lab
- Hermetic Modular Azoth — coming soon
Documentation
The full narrative documentation lives on the Hermetic Modular website. Start there: hermeticmodular.com/docs
It's a walkthrough of the whole SDK, Quickstart, Fundamentals, the control surfaces (knobs, buttons, pages, jacks, presets, settings), firmware anatomy, LED animations, etc.
Beta notice and Community discussion
The Alchemy SDK is in beta. APIs, surface names, and on-disk preset formats may change before the first stable release. I (Luke at Hermetic Modular) look forward to your feedback, and want to make this SDK the best possible for your needs. Please file issues on GitHub or Discord.
Quickstart
stereo_eq.cpp is an excellent
place to start: it opts into most Alchemy Framework features,
demonstrating how to build a fully featured module by bringing your own DSP.
See alchemy-template
for a project skeleton that vendors the Alchemy SDK and libDaisy as git
submodules. This is the recommended starting point for your own module
firmware.
Installation and Requirements
These are the instructions for this SDK repo, and deploying the examples here. In a typical application of the SDK, you would vendor it as a git submodule, like you would with libDaisy.
Requirements
gitcmake≥ 3.21ninjaarm-none-eabi-gcc≥ 12dfu-util
Install the toolchain
Ubuntu / Debian:
sudo apt install git cmake ninja-build gcc-arm-none-eabi dfu-util
macOS (Homebrew):
brew install git cmake ninja dfu-util
brew install --cask gcc-arm-embedded
Clone and build
git clone --recurse-submodules https://github.com/hermetic-modular/alchemy-sdk.git
cd alchemy-sdk
cmake --preset arm
cmake --build --preset arm
Flash an example
Connect the front USB-C port and put the module in update mode: press B3 during the ~2 s bootloader window after power-on (rings spin a warm-white comet), or simply hold while powering on. The rings switch to a slow breathe and the module stays in DFU mode until it's flashed or reset. Then:
cmake --build --preset arm --target stereo_eq-flash
Flashing also works without the button press if dfu-util starts
inside the 2 s window.
Other examples flash the same way, e.g. kick-flash, clock_sync-flash,
v2_cal_test-flash, v2_cv_demo-flash, cv_playground-flash.
Working with CV and Jacks
There are ten jacks total. The middle six are field programmable to be CV in or out. The other four are the audio codec stereo in and out. These can be repurposed for CV in and out, with some caveats.
See cv_playground.cpp for all of these in practice.
J1, J2 are AC-coupled audio inputs with automatic trigger detection, no threshold setup. Call hw.StartAudio(callback), or hw.StartAudio() for triggers alone, then read RisingEdge() in OnPoll. Each read clears the latch; multiple arrivals coalesce. These inputs detect fast positive transitions, not held gates or absolute voltage.
J3–J8 are the field programmable jacks. They can be mode changed with EnableCvOutput() which closes an analog switch to route the backing DAC (MCP4728 on J3–J6, STM DAC1 on J7–J8); DisableCvOutput() disconnects the DAC. This can be set at boot or changed live for unique firmware development opportunities.
J9, J10 are codec audio outputs, DC-coupled. EnableCvOutput() claims that codec channel from your audio callback and fills it with the SetVolts() target every block — the highest precision on the board (24-bit), at audio-block update rate.
Jack reference
| Jack | Type | Output bits | Output latency | Input bits | Input latency | How to change |
|---|---|---|---|---|---|---|
| J1 | Codec In | N/A | N/A | 1 | audio block | automatic |
| J2 | Codec In | N/A | N/A | 1 | audio block | automatic |
| J3 | Ext Dac | 12 | ~70 µs (I²C) | 16 | audio rate | Enable/DisableCvOutput() |
| J4 | Ext Dac | 12 | ~70 µs (I²C) | 16 | audio rate | Enable/DisableCvOutput() |
| J5 | Ext Dac | 12 | ~70 µs (I²C) | 16 | audio rate | Enable/DisableCvOutput() |
| J6 | Ext Dac | 12 | ~70 µs (I²C) | 16 | audio rate | Enable/DisableCvOutput() |
| J7 | STM Dac | 12 | <1 µs | 16 | audio rate | Enable/DisableCvOutput() |
| J8 | STM Dac | 12 | <1 µs | 16 | audio rate | Enable/DisableCvOutput() |
| J9 | Codec Out | 24 | audio block | N/A | N/A | Enable/DisableCvOutput() |
| J10 | Codec Out | 24 | audio block | N/A | N/A | Enable/DisableCvOutput() |
All output ranges are ±5 V at the panel.
HostLink — live host preset & settings access
alchemy::hostlink exposes a module's preset slots and live state to a
host (the companion website, the tools/hostlink-cli bench tool) over
USB CDC serial, while the module runs normally. Protocol spec:
docs/hostlink-protocol.md.
In practice, this is what allows you to connect to the preset manager in hermeticmodular.com
Buttons that carry state (mode cycles, toggles) get the same treatment
as knobs — declared once as a VirtualButton, persisted and
host-editable through a ButtonBank: see
docs/buttons.md.
The clearest way to dive in is to review the example in hostlink.cpp
It builds directly on the existing Presets / Serializable machinery,
so any app that already calls presets.Manage(...) gets backup/restore
for free; adding field labels gets it a full descriptor-driven editor on
the host with zero host-side code per module.
#include "alchemy/host_link/host.h"
#include "alchemy/host_link/diagnostics.h"

static alchemy::hostlink::Host host(
    presets, "mymod", "My Module", "1.0.0", GIT_HASH);
static alchemy::hostlink::Diagnostics debug; // optional

// After hw.Init(), before loop.Tick():
host.Extend(debug);
loop.Use(host);
debug.Info("Ready");
The Host defaults transport, board-specific USB port, buffers, identity,
and descriptor generation. For a diagnostics-only firmware, omit the
presets constructor argument. See USB diagnostics
for messages, live values, CLI viewing, and the web programmer console.
The lower-level transport and engine APIs remain available for custom
integrations.
All command execution happens in Poll() (the control-loop context),
never the audio ISR, so host commands serialize naturally with on-device
gestures.
Bootloader Information
Alchemy Lab V2 boards run a board-specific fork of the Daisy bootloader. It serves DFU on the front-panel USB-C port, renders bootloader state on the panel, and latches into update mode when B3 is pressed during the boot window.
Bootloader Details
The bootloader is also open source.
Apps built with this SDK can also enter update mode programmatically:
daisy::System::ResetToBootloader(
    daisy::System::BootloaderMode::DAISY_INFINITE_TIMEOUT);
This could be used to support multiple firmwares in flash at once without requiring a reflash as a future feature.
Animation library
A ring rendering is a stack — one Base showing the value, plus any number
of overlays composed on a RingFrame, driven by plain floats (knob
values, published DSP state, time phases). Two overlay primitives cover
every animation; everything else is a parameter.
| Slot | Options |
|---|---|
| Base (exactly 1) | Fill/Edge · Fill/Center (movable pivot) · Selector · Gradient / GradientFill |
| Overlays (0..N) | Pip — a positioned element: cursor, comet, ping, playhead, landmark, notch, afterglow · Field — a brightness texture: breathe, ripple, shimmer, stutter, banding |
| Stateful animators | Sparkle · BeatPip |
| System | catch pip, painted by Emit, always on top |
Declarative rings (ParamSlot + PerfRenderer) and fully custom rings
share the same rendering core. See
docs/ring-animations.md for the model, the
full parameter reference, and migration notes, and
examples/ring_demo for a working composition.
Calibration
Every production board self-calibrates its six CV jacks — DAC out and ADC in — with no external equipment, using the board's built-in DAC→jack→ADC loopback and the STM32's factory voltage reference.
To calibrate: unpatch all CV jacks, then hold B1 + B2 while the board resets. The LED panel narrates the ~15 s procedure (rings fill as each jack is swept), flashes green on success, and the board reboots calibrated. The result is a 120-byte record in a dedicated QSPI sector that survives firmware reflashes — calibrate once per board, every SDK firmware picks it up automatically.
The set volts functions apply calibration transparently - hw.j3.SetVolts(volts) and
hw.j3.Volts() - and fall back when no record exists. Use hw.IsCalibrated() to find out if a record exists. See
v2_calibration.h for details and
examples/v2_cal_test for a toggle calibration test app.
SetVolts() writes and latches on every call. On J3..J6 that is a full I2C
round each time. Instead, stage them all and latch once:
hw.j3.StageVolts(a);
hw.j4.StageVolts(b);
hw.FlushCvOutputs();   // one WriteAll + one LDAC pulse, ~430 us
FlushCvOutputs() returns immediately when nothing is staged, so a control
loop can end every tick with it. StageVolts() on J7..J10 is just
SetVolts() — those backends have no latch to defer — so you can stage
uniformly across jacks without branching on which one you hold.
Expansion Header
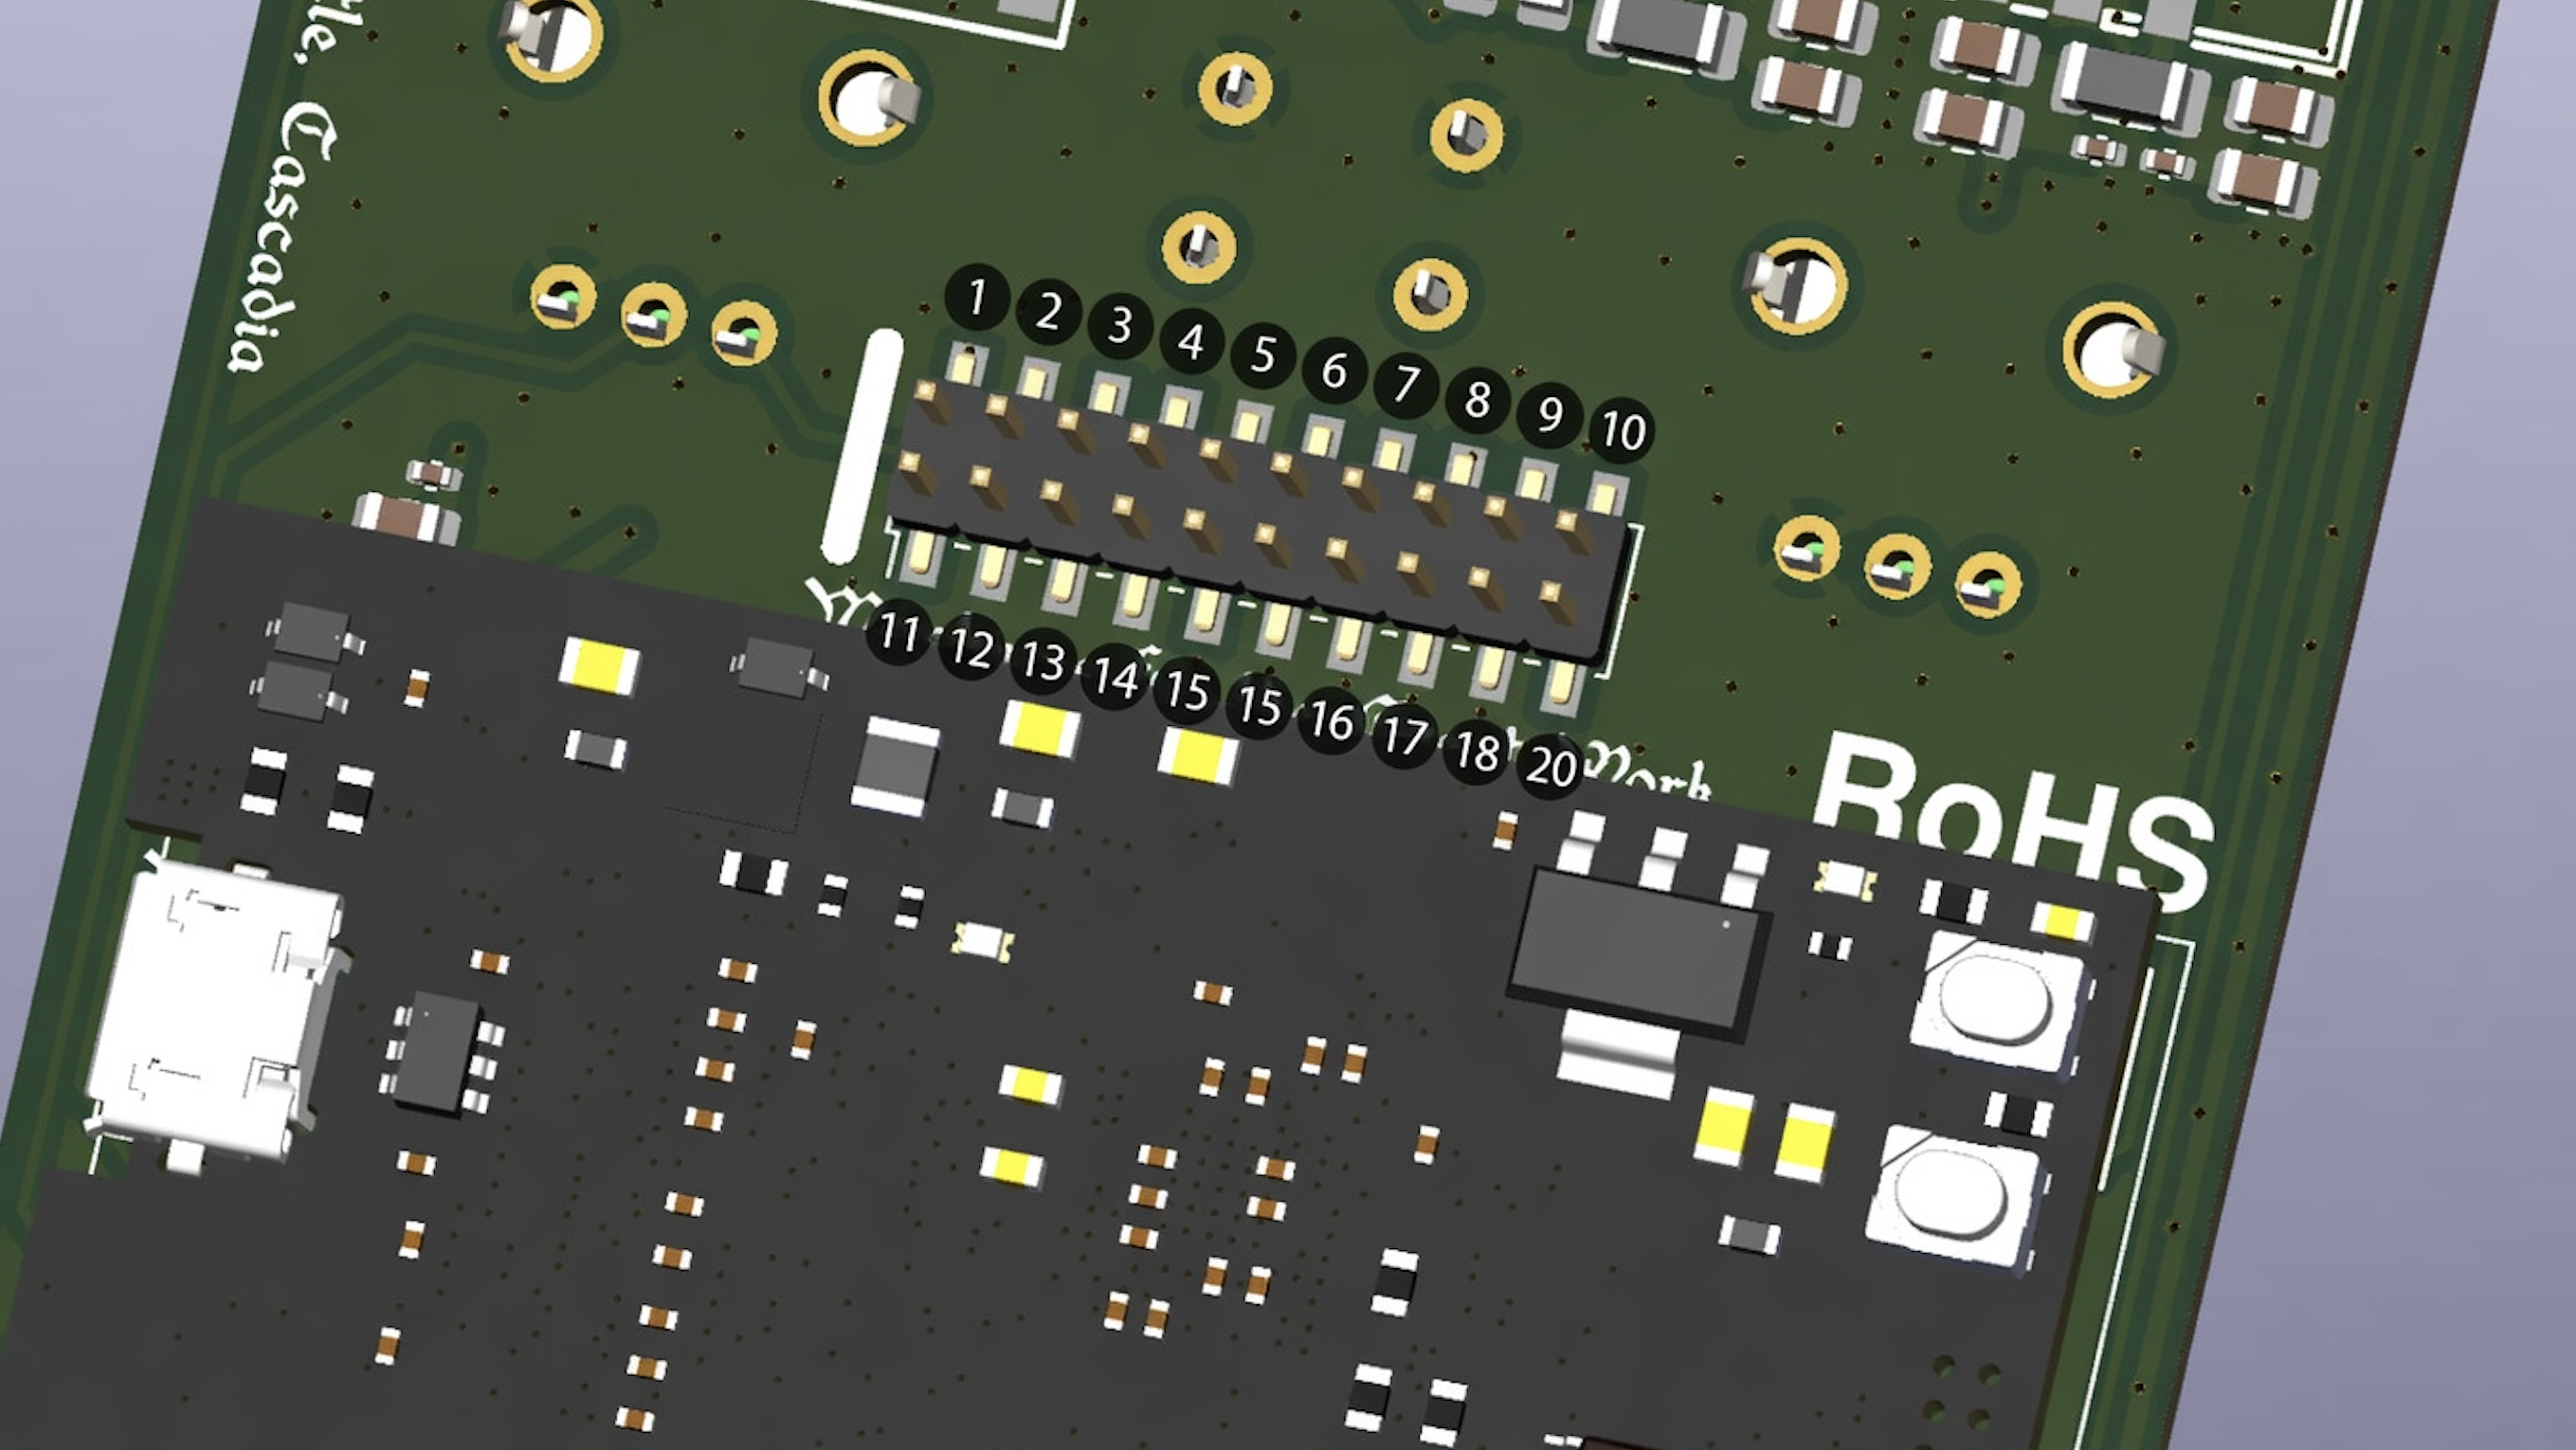
There is an expansion header on the back of the unit. In the future, there will be official Hermetic Modular expanders. In the meantime, an enterprising developer is welcome to develop their own expander modules.
Header Pinout
Numbered/named pins (B1–B8) are direct connections to the exposed
Daisy Seed2 DFM pins, and together expose SPI1, an I²C bus, and
USART1 RX/TX.
| Pin | Signal | Pin | Signal | |
|---|---|---|---|---|
| 11 | +12 V | 1 | −12 V | |
| 12 | GND | 2 | GND | |
| 13 | GND | 3 | B2 | |
| 14 | GND | 4 | B4 | |
| 15 | 3V3A | 5 | GND | |
| 16 | GND | 6 | B6 | |
| 17 | GND | 7 | B5 | |
| 18 | GND | 8 | B3 | |
| 19 | GND | 9 | B1 | |
| 20 | B8 | 10 | B7 |
Board versions
V2 is the board every firmware targets:
cmake --preset arm # V2 (the default)
(Equivalent to setting -DALCHEMY_BOARD=v2 by hand. The legacy v1
board builds only with an explicit -DALCHEMY_BOARD=v1, and warns.)
- v1 — original dev board. You probably don't have one of these unless you were an alpha tester.
- v2 — The standard production board shipped by Hermetic Modular.
V2-only examples (v2_cal_test, v2_cv_demo, cv_playground) build only when
ALCHEMY_BOARD=v2. V1 doesn't have CV out.
License
The Alchemy SDK is released under the MIT License — build, fork, remix, and ship commercial firmware modules freely.
Bundled dependencies retain their own licenses; notably, libDaisy is independently MIT-licensed by Electrosmith. We love Electrosmith!